
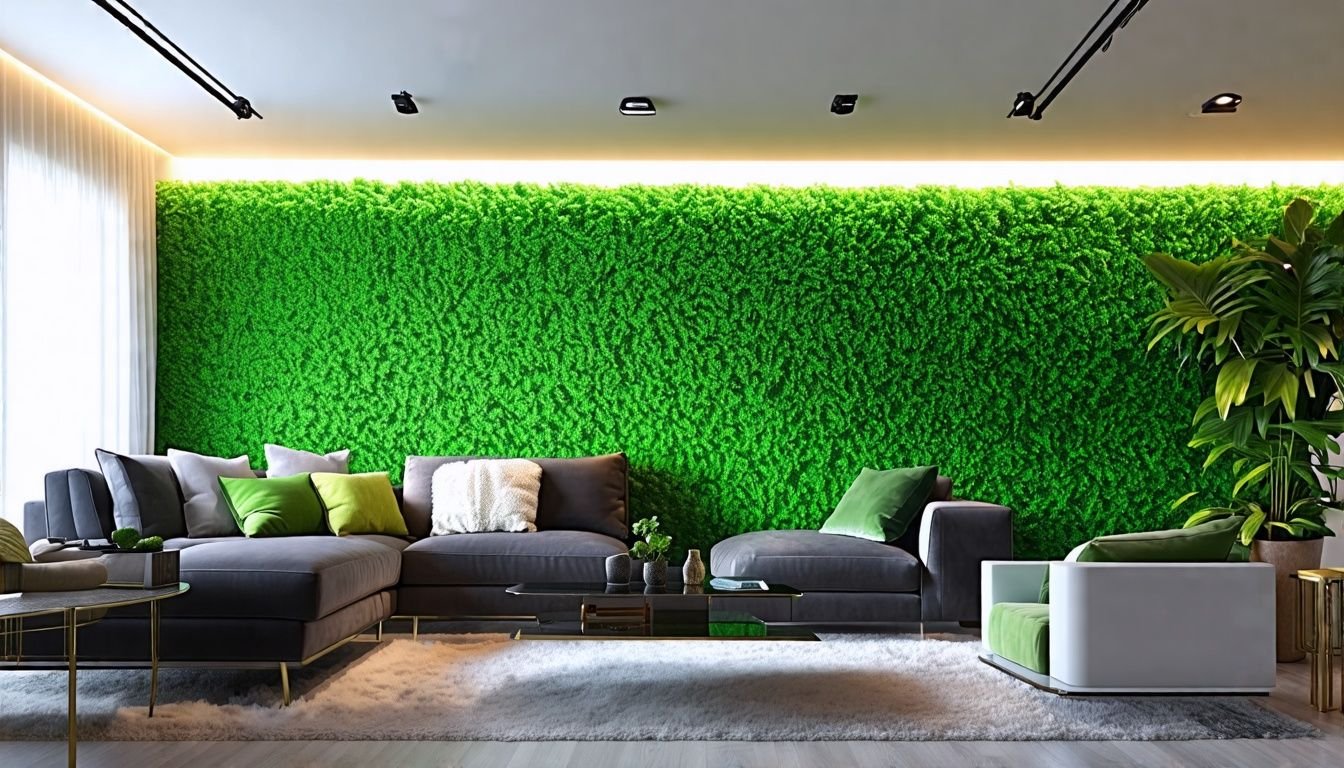
G’day mates! Tired of those plain, dull walls in your home? We understand. Many of our friends have shared their struggles to add a bit of life to their indoor spaces. A fake grass wall could be the perfect solution to spruce up your room and bring a touch of nature indoors.
We’ve all experienced bare walls and wished for a green oasis. That’s why we decided to explore artificial greenery in depth. Fake grass walls are made from high-quality polypropylene plastic and are UV-protected.
It’s true! This means they can withstand all seasons without fading or wear. Our research has revealed the best ways to create an excellent fake grass wall that’ll transform your space.
In this guide, we’ll take you through the steps to make your own lush, green wall. We’ll cover everything from selecting the right materials to installation tips and decorative touches.
So grab a cuppa and prepare to turn your boring wall into a real conversation starter.
Key Takeaways
- Fake grass walls use high-quality polypropylene plastic that’s UV-protected, making them durable for indoor use.
- Different types of artificial grass suit various needs, like nylon for high-traffic areas, polyethylene for a soft touch, and polypropylene for decorative walls.
- Essential tools for installation include artificial grass panels, cable ties, a utility knife, and adhesive, with Bindy offering 979 product options.
- Proper wall preparation involves cleaning, priming, and ensuring a dry surface before attaching grass panels with adhesive and staples.
- Decorative enhancements like LED strip lights, fairy lights, and artificial flowers (e.g., English Lavender – S9P for $65.00) can add colour and depth to the grass wall.
Selecting the Right Materials

Picking the right stuff for your fake grass wall matters a lot. We’ll guide you through choosing the best artificial turf and tools for your project.
Types of artificial grass
We love the look of lush green grass indoors. Artificial grass offers a perfect solution for creating stunning vertical gardens without the fuss of real plants.
- Nylon Grass: This type is tough and can handle heavy foot traffic. It’s great for high-use areas and stays cool even in direct sun.
- Polyethylene Grass: We often use this for indoor walls. It’s soft to touch and looks very natural. The VIOLET GROTTO – SH121 at $79.00 is a great example of this type.
- Polypropylene Grass: This is the cheapest option. It works well for low-traffic areas or purely decorative walls. The FRENCH RETREAT – SH111 at $120.00 uses this type.
- Short Pile Grass: This type has fibres under 30mm long. It’s perfect for a neat, tidy look in your home or office.
- Long Pile Grass: With fibres over 30mm, this grass gives a fuller, more natural look. The SHANGRI-LA – CCGF001 at $125.00 is a prime example.
- Textured Grass: This type has different fibre lengths and colours. It mimics the look of real grass more closely. The GARDEN FESTIVAL – CCGA109 at $125.00 shows this style well.
- Infill Grass: Some types need sand or rubber infill for a more realistic feel. These work great for outdoor spaces but less so for indoor walls.
- Multi-Tone Grass: This grass uses different shades of green. It creates depth and looks more like real turf. THE BUSHMAN – CCGA074 at $125.00 is a good choice for this style.
Essential tools and supplies
Now that we’ve covered artificial grass types, let’s talk about the tools and supplies you’ll need. Our list includes everything to create your stunning fake grass wall. Here’s what you’ll want to gather:
- Artificial grass panels: Our package includes 20 high-quality polypropylene panels, each measuring 60cm x 40cm x 4cm.
- Cable ties: We provide 200 cable ties to secure your panels firmly to the wall.
- Measuring tape: This helps you plan your layout and ensure a perfect fit.
- Utility knife: Use this to trim panels for a custom look.
- Pencil: Mark your cutting lines and panel placement on the wall.
- Level: Keep your panels straight for a professional finish.
- Drill and screws: These are handy for extra secure attachment on certain wall types.
- Safety gear: Gloves and safety glasses protect you during installation.
- Cleaning supplies: A soft brush and mild detergent keep your wall looking fresh.
- Decorative items: Consider adding faux flowers or LED lights for extra flair.
Preparing Your Space
We’ll start by measuring our wall space and planning our design. This step helps us avoid mistakes and ensures we have enough materials for the job.
Measuring and planning
Proper planning sets the stage for a stunning fake grass wall. We’ll guide you through the essential steps to measure and plan your indoor space effectively.
- Measure the wall area:
- Use a tape measure to find the width and height of your wall
- Multiply these numbers to get the total square metres needed
- Add 10% extra for trimming and mistakes
- Choose your grass type:
- Pick from options like Green Wall with Lawn Grass Panels at AU$87.45
- Consider texture, colour, and pile height for your space
- Calculate panels needed:
- Divide your total wall area by the size of each grass panel
- Round up to the nearest whole number for your order
- Plan panel layout:
- Sketch your wall on graph paper
- Mark where each panel will go
- Note any obstacles like light switches or outlets
- Gather tools and supplies:
- Make a list including adhesive, utility knife, and straight edge
- Don’t forget safety gear like gloves and goggles
- Set a budget:
- Factor in the cost of panels, tools, and any extra decor
- Look for deals like the 30% off on Custom Wedding Grass Wall Signs
- Schedule your project:
- Allow enough time for delivery and installation
- Plan for proper ventilation during the adhesive process
Wall preparation
After measuring and planning, we move on to wall preparation. This step ensures our fake grass wall will look stunning and last long.
We start by cleaning the wall surface. A clean wall helps the adhesive stick better. We remove any dirt, dust, or old paint chips. For smooth walls, we use sandpaper to create a slightly rough texture.
This roughness gives the adhesive more grip.
Next, we apply a primer to the wall. Primer helps seal the surface and creates a good base for the adhesive. We let the primer dry fully before moving on. For uneven walls, we might need to use a leveling compound.
This compound fills in any gaps or bumps, creating a flat surface for our grass panels.
A well-prepared wall is the foundation of a beautiful fake grass feature.
We always make sure the wall is completely dry before we start installing the grass panels. Moisture can weaken the adhesive and lead to problems later on. With these steps done, we’re ready to transform our indoor space with a stunning fake grass wall.
Installation Process
We’ll guide you through the steps to attach your grass panels. Our tips will help you secure and trim the grass for a flawless look.
Attaching the grass panels
Attaching grass panels forms the core of our fake grass wall project. We’ll guide you through this process step-by-step to ensure a stunning result.
- Measure and cut panels: Use a sharp utility knife to trim the artificial grass to fit your wall space.
- Apply adhesive: Spread a strong, waterproof adhesive on the back of each panel using a notched trowel.
- Position panels: Place the first panel in a corner, pressing firmly against the wall. Work your way across, aligning edges carefully.
- Secure edges: Use a staple gun to fasten the edges of each panel to the wall for extra hold.
- Smooth out bubbles: Roll a heavy cylinder over the surface to remove air pockets and ensure full contact.
- Trim excess: Cut away any overhanging grass with sharp scissors for a neat finish.
- Join seams: Use seaming tape or additional adhesive to blend panel edges seamlessly.
- Add final touches: Brush the grass fibres to create a natural, uniform look across the entire wall.
Securing and trimming for a perfect fit
We’ve reached a crucial stage in creating our fake grass wall. Let’s make sure our artificial turf fits perfectly and stays put for a stunning indoor garden look.
- Secure the edges: Use a staple gun to fasten the grass edges to the wall. Space staples about 10 cm apart for a firm hold.
- Trim excess material: Cut off extra grass with sharp scissors. Follow the wall’s outline for a clean edge.
- Smooth out wrinkles: Press the grass flat against the wall. Iron out any bumps for a natural look.
- Check for gaps: Fill small spaces between panels with grass clippings. This creates a seamless appearance.
- Reinforce high-stress areas: Add extra staples to corners and edges. This prevents sagging over time.
- Blend seams: Gently brush the grass to hide panel joins. This step makes your wall look like one piece.
- Test stability: Lightly tug on different areas of the grass. Fix any loose spots you find.
- Final trim: Step back and look for any uneven areas. Trim as needed for a uniform surface.
Decorative Enhancements
We can jazz up your fake grass wall with some cool extras. Lights and flowers can turn your green space into a real showstopper.
Adding lights
Lights add a magical touch to our fake grass wall. We love using LED strip lights to create a soft glow behind the greenery. These lights come in various colours and can be controlled with a remote.
We often place them along the edges of the wall or in patterns across it. This creates depth and makes the wall pop, especially at night.
For a more natural look, we use small fairy lights. These tiny bulbs mimic fireflies or stars peeking through leaves. We weave them through the grass, hiding the wires for a seamless effect.
Some Aussie gardeners even use solar-powered lights for an eco-friendly option. These work great for outdoor fake grass walls too.
Lighting transforms a simple grass wall into a living, breathing piece of art.
Spotlights offer another way to highlight our green masterpiece. We place them at the base or top of the wall, aiming up or down. This casts interesting shadows and brings out the texture of the grass.
For a pro tip, we use warm white lights to enhance the natural feel of our indoor garden oasis.
Incorporating flowers or patterns
We love adding flowers and patterns to our fake grass walls. It brings life and colour to any indoor space. Artificial blooms like English Lavender – S9P, now $65.00 at Bindy, work great.
We mix in different shades and sizes for a natural look. Patterns can be fun too. We create stripes or zigzags with contrasting grass types. Purple Rain – SH105, on sale for $110.00, offers a bold hue for striking designs.
For a lush, varied look, we combine grasses with different textures. Colosseum Hedge – S-23, priced at $70.00, pairs well with smoother options. We also use Water Grotto – S-22, available for $65.00, to add depth.
These choices let us craft unique walls that reflect our style and brighten our homes.
Visit Bindy for More Ideas and Supplies
At Bindy, we offer a vast array of artificial grass wall products to suit your needs. Our platform boasts 979 relevant options, giving you plenty of choices for your indoor garden project.
We’ve made it easy to find what you’re after with our handy filter options. You can choose to view all sellers or focus on our star sellers for top-notch service. Plus, our sorting features let you organise products by relevance, price, customer reviews, or newest arrivals.
Our range goes beyond just fake grass walls. We stock a variety of home and outdoor decor items to complement your new green space. From flower arrangements to lighting options, we’ve got everything you need to bring your vision to life.
Don’t forget to check out our Etsy shop for unique, handcrafted items that will add a special touch to your indoor garden. Now, let’s wrap up with some final thoughts on creating your stunning fake grass wall.
Conclusion
We’ve demonstrated the process of creating an attractive artificial grass wall for your interior. This project introduces a natural element to your home without the maintenance of live plants.
Our guide encompasses all aspects, from selecting materials to incorporating decorative elements. Using these suggestions, you can establish a verdant retreat in any room. Bindy provides excellent ideas and materials for your upcoming home decor endeavour.
Prepare to appreciate your new, verdant indoor garden!
FAQs
1. What materials do I need to create a fake grass wall for indoor decor?
You’ll need artificial hedge panels, a sturdy backing board, adhesive, and mounting hardware. Choose high-quality synthetic turf for a realistic look. Measure your space carefully before buying materials.
2. How do I install a fake grass wall in my home?
First, secure the backing board to your wall. Then, apply adhesive to the board and press the artificial hedge panels firmly against it. Trim excess material with sharp scissors. Ensure even coverage for a seamless look.
3. Can I customise my indoor fake grass wall?
Absolutely. Add faux flowers, decorative elements, or LED lights to create a unique look. You can also shape the artificial hedge to fit specific areas or create patterns. This versatility makes it a popular choice for home decor enthusiasts.
4. How do I maintain my indoor artificial grass wall?
Maintenance is simple. Dust it regularly with a soft brush or vacuum on low power. For deeper cleaning, use a damp cloth with mild soap. Avoid harsh chemicals or excessive water. With proper care, your indoor decor piece will stay fresh for years.