
G’day, mates! Ever dreamt of having a ripper green wall in your backyard but worried it’d be a right pain to maintain? No worries, we’ve got you covered. Creating an outdoor green wall might seem like a bit of a mission, but it doesn’t have to be a hassle.
We know plenty of Aussies who’d love to jazz up their outdoor spaces with some lush greenery, but baulk at the thought of the upkeep and cost. Fair dinkum, it can be a head-scratcher trying to figure out how to bring more plants into your yard without breaking the bank or spending every arvo watering and pruning.
After doing a fair bit of research, we reckon we’ve found a bonza solution: artificial hedges. These synthetic beauties offer the perfect mix of looks and practicality. Did you know these faux hedges can last up to a decade with barely any fuss? Strewth!
Our guide will walk you through the process of creating your own outdoor green wall using these low-maintenance marvels. We’ll cover everything from picking the right materials to installation tips and tricks.
So, are you ready to give your outdoor area a fair dinkum Aussie makeover?
Key Takeaways
- Artificial hedges offer a low-maintenance solution for creating outdoor green walls that can last up to a decade with minimal upkeep.
- UV-resistant materials are crucial for Australian conditions, with options like Evergreen Walls’ UV Vertical Garden Range designed to withstand harsh sunlight.
- Basic tools needed include a drill, screws, measuring tape, level, and safety gear, with DIY Wall Panel Kits available from suppliers like Evergreen Walls.
- Proper planning involves measuring the space, sketching the design, and deciding between vertical or horizontal layouts to suit your area.
- Lighting options such as LED strips or spotlights can enhance the green wall’s appearance at night, with colour-changing LEDs offering versatility in mood setting.
Choosing the Right Artificial Hedge for Your Green Wall

Picking the perfect artificial hedge for your green wall is crucial. We’ll guide you through key factors like UV resistance, style, and size to ensure your outdoor space looks stunning.
Considerations for UV Resistance
UV resistance stands as a crucial factor in choosing artificial hedges for outdoor green walls. We must select materials that can withstand Australia’s harsh sunlight. High-quality, UV-resistant products ensure our green walls stay vibrant and lush for years to come.
Evergreen Walls offers a UV Vertical Garden Range designed specifically for outdoor settings. These products resist fading and deterioration from constant sun exposure. We recommend checking the UV rating of any artificial hedge before purchase to guarantee long-lasting beauty.
A UV-resistant artificial hedge is like sunscreen for your green wall – it protects against harmful rays and keeps your outdoor space looking fresh.
Let’s explore the aesthetic preferences to consider when selecting your artificial hedge panels.
Assessing Aesthetic Preferences
We know that choosing the right look for your green wall is key. Our artificial hedge options come in various styles to suit your taste. From Coastal Chic to Country Farmhouse and Urban Oasis, we’ve got you covered.
These designs blend well with different outdoor spaces, making your wall a true standout.
Our range also includes Artificial Flower Walls for those who want a pop of colour. If you’re after something unique, check out our Green Wall Discs & Wall Art. These pieces add flair to your outdoor area and can be mixed with hedge panels for a custom look.
We aim to help you create a green wall that fits your style and enhances your outdoor living space.
Determining Panel Sizes and Coverage Needs
We need to figure out the right panel sizes for our green wall project. Our first step is to measure the area we want to cover. This helps us work out how many panels we’ll need. For example, if we’re using Green Tropics Panels (1m x 1m), we can easily calculate the total coverage.
We’ll also want to think about any odd shapes or obstacles in our space.
Choosing the right panel size affects the look of our green wall. Larger panels, like the Spring Sensation Hedge Screen (100cm x 100cm), can create a more uniform appearance. Smaller panels might work better for intricate designs or tight spaces.
We should also consider our budget. The White Oasis Vertical Garden (1m x 1m) is on sale for $124.95, which could influence our decision if we’re watching our spending.
Tools and Materials Required
We’ll need a few key items to build our green wall. Our toolkit will include basic gear and some special bits for a sturdy, eye-catching display.
Basic Tools for Installation
Creating an outdoor green wall with artificial hedge requires a few basic tools. We’ll need a drill, screws, and a screwdriver to secure the support structure. A measuring tape and level will ensure our panels line up perfectly.
Sharp scissors or a utility knife will help trim the hedge panels to fit our space.
For safety, we mustn’t forget protective gear. Gloves will shield our hands from scratches, while safety glasses guard our eyes from debris. If we’re working at height, a sturdy ladder is crucial.
These tools form the backbone of our DIY kit, making the installation process smooth and safe.
Evergreen Walls offers DIY Wall Panel Kits that include these necessary tools. Their Wall Panel Calculator also helps us figure out exactly what we need for our project. With these resources, we’re well-equipped to start our green wall journey, bringing a touch of nature to our outdoor space without the fuss of real plants.
Selection of Supporting Structures
After gathering our basic tools, we’ll move on to selecting the right supporting structures for our green wall. This step is crucial for ensuring our artificial hedge panels stay secure and look great for years to come.
We’ve found that aluminium frames work well for outdoor green walls in Australia. They’re lightweight, rust-resistant, and can handle our harsh sun and occasional heavy rains. For smaller projects, we might opt for a simple trellis system.
These come in various sizes and can be easily attached to existing walls or fences.
For larger green walls, we often use a grid system made of steel or aluminium. This allows us to create a sturdy base that can support multiple hedge panels. We make sure to choose materials that are UV-resistant and won’t corrode over time.
It’s also important to factor in the weight of the artificial plants when selecting our support structure.
Optional Decorative Elements
Moving from supporting structures, we’ll now explore ways to add flair to your green wall. Optional decorative elements can transform your artificial hedge into a stunning focal point.
We love using Green Wall Discs & Wall Art to create unique patterns and textures. These pieces add depth and interest, making your wall stand out.
For a burst of colour, we suggest incorporating Artificial Flower Walls. They’re perfect for adding seasonal touches or creating a year-round floral display. At Evergreen Coastal, you’ll find top-rated options starting at $130.00, with a 4.8/5 rating from 58 reviews.
These elements allow you to customise your green wall, reflecting your personal style and the Aussie love for outdoor living.
Planning Your Green Wall Layout
Planning your green wall layout sets the stage for a stunning outdoor display. We’ll guide you through measuring, designing, and arranging your panels for the best look. Keep reading to learn how to create a eye-catching vertical garden that will wow your neighbours.
Measuring and Preparing the Installation Area
We’ll start our green wall project by measuring the installation area. This step is crucial for a successful outcome. We’ll grab a tape measure and note down the height and width of our chosen space.
It’s best to measure twice to ensure accuracy. We’ll also check for any obstacles like windows, doors, or electrical outlets that might affect our design.
Next, we’ll prep the surface where our green wall will go. We’ll clean it thoroughly and repair any cracks or damage. If the wall is uneven, we might need to add a backing board to create a flat surface.
This will help our artificial hedge panels sit flush against the wall.
A well-measured space is the foundation of a stunning green wall.
We’ll also consider the weight of our chosen materials. Some walls may need extra support to hold the hedge panels and frame. If we’re unsure, we’ll consult a professional to assess the wall’s strength.
At Evergreen Walls, we offer design consultations to help with these technical aspects. Our team can provide expert advice on preparing your space for a beautiful, long-lasting green wall.
Sketching the Design Layout
After measuring and preparing the installation area, we’ll move on to sketching the design layout. This step is crucial for creating a stunning artificial green wall that fits your space perfectly.
We start by grabbing a pencil and paper to draw our vision. Our Wall Panel Calculator helps us plan the layout with ease. We sketch out the wall’s shape, noting any windows, doors, or other features we need to work around.
Then, we plot where each panel will go, making sure they fit snugly together. It’s helpful to use graph paper for this, as it allows us to keep everything to scale.
Next, we consider adding variety to our design. We might mix different types of artificial plants or create patterns with various shades of green. Our lookbooks offer great ideas for inspiration.
We also think about where to place any real plants or decorative elements we want to include. By taking time to sketch out our plan, we ensure our finished green wall will look just as we imagined.
Deciding on Vertical vs. Horizontal Arrangement
We’ll need to decide if our green wall will grow up or across. Vertical layouts create a tall, striking feature that draws the eye upward. They work well on narrow spaces or to hide unsightly walls.
Horizontal designs spread out, making a wider impact. These suit low walls or fences and can define garden borders nicely.
Our choice depends on the space we have and the look we want. Vertical gardens often use modular systems, giving us flexibility to change the design later. For a unique twist, we can mix both styles.
This creates depth and interest, perfect for larger areas. Next, we’ll look at how to install the support structure for our chosen layout.
Installing the Support Structure
Installing the support structure is a key step in creating your outdoor green wall. We’ll guide you through choosing the right support and fixing it securely to ensure your artificial hedge stays put.
Choosing the Right Type of Support
We need to pick the right support for our green wall. A strong base is key for a safe and long-lasting display. We can choose from a few options at Evergreen Walls. Metal frames work well for big walls.
They’re tough and can hold a lot of weight. Wood frames are great for smaller projects. They’re easy to work with and look natural.
For a quick setup, we might want to try modular systems. These come in parts we can put together like puzzle pieces. They’re perfect for changing our design as our garden grows. We can add or remove sections as needed.
This flexibility lets us create unique patterns and shapes.
Our choice of support affects how our green wall looks and works. We’ll want to think about the wall’s size, weight, and where we’re putting it. The right support will make sure our artificial hedge stays put and looks great for years.
Next, we’ll look at how to secure the support to the wall.
Securing the Support to the Wall
After choosing the right support, we’ll move on to securing it to the wall. This step is crucial for the safety and longevity of our green wall project. We’ll need to ensure the support can hold the weight of our artificial hedge panels.
For most walls, we’ll use heavy-duty screws and wall anchors. These provide a strong hold, even for heavier loads. We’ll start by marking the spots where we’ll drill holes. It’s best to use a level to keep everything straight.
Once we’ve drilled the holes, we’ll insert the wall anchors and then screw the support into place.
If we’re working with a brick or concrete wall, we might need special masonry drill bits and anchors. These are designed to grip better in hard surfaces. For wooden walls, we can often screw directly into the studs for extra strength.
Our DIY Wall Panel Kits come with secure attachment methods, making this step easier for us.
Ensuring Stability and Safety
We must ensure our green wall is stable and safe. This step is crucial for the long-term success of our outdoor project. We’ll start by checking the wall’s structure and weight-bearing capacity.
It’s vital to use strong, weather-resistant materials for the support frame. We recommend stainless steel or treated timber for durability.
Our team always stresses the importance of proper anchoring. We use heavy-duty wall plugs and screws to secure the frame firmly. For added safety, we space the anchor points evenly across the wall.
This spread helps distribute the weight of our artificial hedge panels. We also offer fire-rated options for extra peace of mind. Regular checks for wear and tear will keep our green wall looking great and staying safe for years to come.
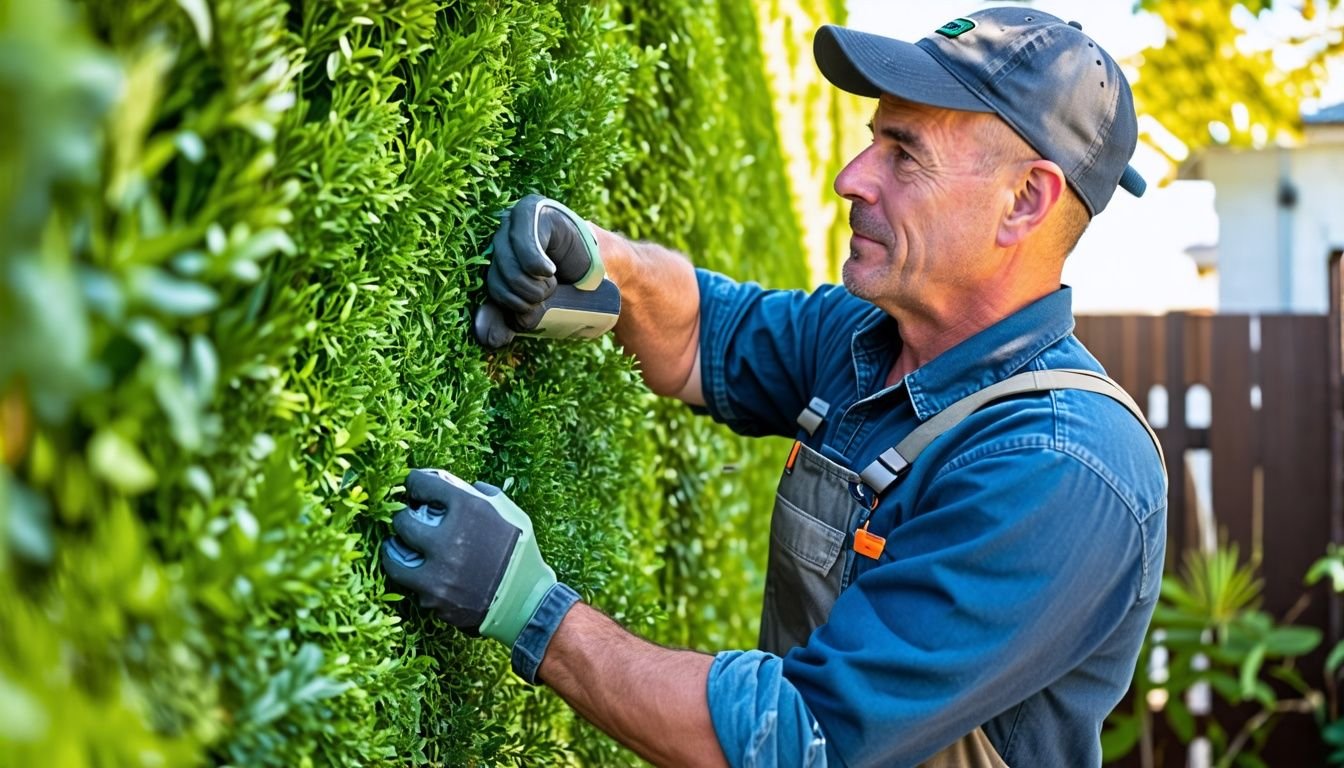
Attaching the Artificial Hedge Panels
Attaching artificial hedge panels is a crucial step in creating your outdoor green wall. We’ll guide you through the process of securing these panels to your support structure for a natural, seamless look.
Preparing the Panels for Installation
We’ll start by cleaning our artificial hedge panels. This step is crucial for a flawless green wall. We’ll use a soft brush to remove any dust or debris from the panels. For stubborn dirt, a damp cloth works wonders.
It’s important to let the panels dry completely before we move on.
Next, we’ll inspect each panel for any damage or defects. We want our green wall to look perfect, so we’ll set aside any panels that need repair. If we’re using UV-resistant panels, we’ll double-check that the protective coating is intact.
This will help our wall stay vibrant under the harsh Australian sun.
Finally, we’ll lay out our panels in the planned design. This dry run helps us spot any gaps or mismatches before we start attaching them. We’ll trim any excess material if needed, making sure each panel fits snugly with its neighbours.
With our panels prepped and ready, we’re all set to create a stunning outdoor green wall that will be the envy of our neighbourhood.
Techniques for Attaching Panels to the Support
We’ve found several effective ways to attach artificial hedge panels to your support structure. Our favourite method uses the securing hardware included in our kits. These sturdy clips or brackets grip the panels firmly and fasten them to the frame.
We space these attachments evenly across the back of each panel for the best hold.
Another great technique involves zip ties or cable ties. These handy fasteners thread through the panel mesh and wrap around the support bars. We make sure to pull them tight and trim any excess length for a neat look.
For extra strength, we sometimes use both clips and zip ties together.
Adhesive strips offer a third option for attaching panels, especially on smooth surfaces. We clean both the panel back and the support area first. Then we apply strong, weather-resistant strips to bond the two together.
This method works well for lightweight panels in sheltered spots.
Aligning Panels for a Natural Look
We aim for a seamless look when attaching our artificial hedge panels. Proper alignment hides any visible seams, creating a natural, lush appearance. Our trick is to stagger the panels slightly, much like laying bricks.
This method blends the edges and gives a more organic feel to our green wall. We also pay close attention to the direction of the foliage, ensuring it flows consistently across the entire wall.
For best results, we start from one corner and work our way across and down. As we go, we check that each panel sits flush against its neighbours. The Evergreen Premium 30 x 90 panels, rated 5.0/5 by 23 reviewers, offer great coverage at $150.00 each.
If we’re after a coastal look, the Coastal Deluxe panels at $175.00 with a 4.9/5 rating from 24 reviews are a top choice. These high-quality options help us achieve a stunning, natural-looking green wall that will impress any Aussie garden lover.
Adding Irrigation Systems (Optional)
We’ll show you how to add a watering system to your green wall. This step can keep your artificial plants looking fresh and clean. Want to learn more? Read on!
Types of Irrigation Systems for Artificial Walls
Artificial walls need water too! We’ve found that drip irrigation systems work best for these green beauties. They deliver water straight to the base of plants, cutting waste and keeping leaves dry.
This method suits both real and fake plants, making it a top choice for Aussie gardeners.
For larger setups, we recommend integrated irrigation solutions like the Gro-Wall Slim-Line Pro kit. It’s a ripper system that makes watering a breeze, even for big walls. Hydroponics is another smart option.
It uses less water than traditional methods and keeps plants happy without soil.
No matter which system you pick, regular checks are key. We always test our irrigation setup to make sure it’s working properly. This helps catch any issues early, saving time and water in the long run.
With the right care, your green wall will thrive and bring a touch of nature to any space.
Installation Tips for Irrigation Systems
We’ve found that installing irrigation systems for artificial green walls can be a breeze with the right approach. Our top tip is to plan your system before you start. We map out where the water lines will go and decide on the best spots for sprinklers or drip emitters.
This step saves time and ensures even water distribution across your vertical garden.
For larger installations, we recommend integrated irrigation solutions. These systems can be set up to water your green wall automatically, making maintenance a snap. We often use drip irrigation techniques, which are great for efficient water use.
This method delivers water directly to the base of each plant, reducing waste and promoting healthy growth.
While artificial plants don’t need watering, real plants in your green wall still require care. We suggest installing a timer to your irrigation system. This allows you to control when and how much water your plants receive.
It’s a simple way to keep your vertical garden lush and thriving, even during busy periods or holidays.
Incorporating Lighting Solutions
We’ll show you how to light up your green wall for a stunning night-time display. Read on to learn about choosing the right lights and installing them for maximum impact.
Selecting Appropriate Lighting
Lighting plays a key role in making your outdoor green wall stand out. We suggest using LED lights for their durability and energy efficiency. These lights work well for both indoor and outdoor settings, giving your wall a stunning look day and night.
Our team at Evergreen Walls can help you pick the perfect lighting during a design consultation.
For the best effect, we recommend placing lights at different angles. This creates depth and highlights the texture of your artificial hedge. Warm white lights often give a natural, cosy feel, while cool white lights can make your wall pop.
It’s important to choose weather-resistant fixtures for outdoor use to ensure they last long and stay safe.
Installation of Lights for Aesthetic Enhancement
We love to make our green walls shine at night. Proper lighting can turn a simple hedge into a stunning feature. We often use LED strips or spotlights to create this effect. These lights are easy to install and use little power.
We place them behind or within the hedge panels to create depth and shadow.
Our favourite trick is to use colour-changing LEDs. These let us switch up the mood of our outdoor space with just a tap. For a natural look, we go for warm white lights. They mimic moonlight and make the green pop.
Cool white lights give a modern, crisp feel. We make sure to hide the wires and fixtures. This keeps the focus on the plants, not the tech.
Timers are a great add-on for our lighting setup. They turn the lights on and off at set times. This saves power and adds a touch of magic as the wall lights up at dusk. We also like to use motion sensors in some areas.
They create a fun surprise for guests as they walk by. With the right lights, our green walls become a 24-hour feature in our gardens.
Maintenance and Upkeep
Regular upkeep keeps your artificial green wall looking fresh and vibrant. We’ll show you simple cleaning tricks and how to spot wear before it becomes a problem. Read on to learn how to keep your outdoor oasis in top shape year-round.
Cleaning and Dusting the Panels
We know that keeping our artificial hedge panels clean is key to maintaining their fresh look. Dust and dirt can build up over time, dulling the vibrant green appearance we love. A quick dust with a soft brush or cloth every few weeks will keep the panels looking their best.
For a deeper clean, we use a damp cloth with mild soap to gently wipe down the leaves and stems.
UV-resistant materials help our panels stay bright and lush for longer, but they still need care. We’ve found that routine dusting, as mentioned in our FAQs, is the best way to keep our green wall looking top-notch.
It’s a simple task that makes a big difference in preserving the beauty of our outdoor space. Plus, it’s a great excuse to spend some time in the garden, enjoying our handiwork.
Routine Check for Wear and Tear
After cleaning, we move on to checking our green wall for wear and tear. This step is vital to keep our outdoor oasis looking fresh and vibrant. We inspect each panel closely, looking for any signs of damage or fading.
UV-resistant materials help, but even they can show signs of ageing over time.
Our routine checks include feeling for loose panels and examining the support structure. We pay extra attention to areas that get more sun or rain. If we spot any issues, we fix them right away to prevent bigger problems.
Regular inspections help us catch small issues before they grow, keeping our green wall looking its best for years to come.
Replacing Damaged Panels
Regular checks help us spot wear and tear early. But sometimes, we might need to replace damaged panels on our artificial green wall. Don’t worry – it’s easier than you might think!
We’ve got good news for Aussie plant lovers. Easy replacement options are available for our artificial hedge panels. If we notice any damage, we can contact Evergreen Walls for replacement panels.
Many customers have shared positive reviews about the durability of these panels and how simple they are to replace.
Replacing a panel is a straightforward process. We start by removing the damaged section carefully. Then, we slot in the new panel, making sure it fits snugly with the surrounding pieces.
This quick fix keeps our green wall looking fresh and vibrant all year round. With these easy steps, we can maintain our outdoor oasis without breaking a sweat.
Customisation Tips
We love to add our own flair to green walls. You can mix real plants with fake ones or add seasonal decorations to keep things fresh.
Integrating Real Plants with Artificial Hedges
We’ve found a great way to blend nature with our artificial hedge walls. Adding real plants like ivy and shrubs brings life to your green space. It’s easy to do and creates a stunning look.
We use modular systems to mix fake and real plants seamlessly. This hybrid approach gives us the best of both worlds – low upkeep and natural beauty.
Our DIY guide shows how to create these mixed walls step by step. We’ll teach you to pick the right spots for live plants and how to care for them. You’ll learn tricks to make the artificial and real parts work together.
The result is a lush, green wall that looks natural and stays fresh all year round.
Adding Seasonal Decorative Elements
Our artificial green wall can shine with real plants. Now, let’s talk about adding seasonal flair. Artificial flower walls offer a great way to change up your green wall’s look throughout the year.
We can swap out flowers to match each season, keeping our outdoor space fresh and exciting. For spring, bright tulips or daffodils work well. Summer calls for bold sunflowers or cheerful daisies.
In autumn, we might add some artificial fall leaves or berries. Winter could see the addition of holly or evergreen branches. These seasonal touches bring life to our green wall all year round.
Evergreen Walls offers customisation services to help us create the perfect seasonal look. With their help, we can design a wall that changes with the times, always looking its best.
Troubleshooting Common Issues
Even the best artificial green walls can face issues over time. We’ll guide you through fixing common problems like fading, loose panels, and weather damage.
Handling Discolouration and Fading
We know that fading and discolouration can be a real pain for artificial hedge owners. Sun exposure often leads to these issues, but don’t worry – we’ve got you covered! UV-resistant materials are key to keeping your green wall looking fresh.
We always recommend choosing panels made with these special materials to prevent fading from the start.
Regular checks are crucial for spotting early signs of colour loss. We suggest a quick look-over every few weeks, especially during summer. If you notice any changes, it’s best to act fast.
Our team is always ready to offer advice on colour restoration. We can guide you through simple steps to bring back that vibrant green look.
Sometimes, a good clean is all your hedge needs to look new again. Dust and dirt can make panels look dull, so a gentle wash can work wonders. For tougher cases, we might suggest special treatments or panel replacements.
Let’s move on to fixing loose panels, another common issue for green walls.
Fixing Loose Panels
After dealing with discolouration, we’ll move on to fixing loose panels. Loose panels can ruin the look of your green wall and pose safety risks. Our team often gets calls about this issue, and we’ve got some handy tips to share.
First, check the attachment points of your panels. If screws or nails have come loose, simply tighten or replace them. For panels fixed with adhesive, clean the area and reapply a strong, outdoor-grade glue.
If the panel itself is damaged, it’s best to replace it entirely. We offer customer support to help you through this process, ensuring your artificial hedge stays secure and beautiful.
Dealing with Weather Effects
We know Aussie weather can be tough on outdoor green walls. Our UV Vertical Garden Range is built to handle the harsh sun and sudden downpours. Many customers have told us how well these panels hold up over time.
To keep your wall looking fresh, we suggest a quick hose-down after dusty days. For areas prone to strong winds, extra secure fastenings might be needed. A clear sealant can also help protect against fading and moisture damage.
Conclusion
Creating an outdoor green wall with artificial hedge is a fun and rewarding project. We’ve provided advice on selecting materials, planning, and installation. Our guide assists you in transforming your space with low-maintenance greenery.
It’s important to regularly inspect your work and make adjustments as needed. Your new green wall will enhance the beauty and privacy of your outdoor area for years to come.
FAQs
1. What materials do I need for a DIY outdoor green wall with artificial hedge?
You’ll need artificial trees or hedges, green discs, pots & planters, and a trellis system. These items create a low-maintenance greenery solution that’s perfect for residential gardens.
2. How do I ensure my artificial vertical garden stays vibrant in harsh weather?
Choose UV-resistant artificial plants to prevent fading. This approach keeps your living wall looking fresh without the upkeep of real plants like tomatoes or eggplant.
3. Can I use artificial hedges for branding and signage purposes?
Absolutely! Artificial vertical gardens offer a great canvas for branding. You can incorporate logos or messages, making them ideal for B2B marketing in outdoor spaces.
4. Are artificial green walls better for the environment than living walls?
Artificial walls don’t require water or emit scraps, reducing their environmental impact. However, living walls can help combat global warming by absorbing emissions.
5. How do I maintain my DIY artificial hedge wall?
Maintenance is minimal. Simply dust or rinse occasionally to keep it clean. Unlike a real lawn or garden, there’s no need for regular watering or pruning.
6. Where can I find more information on creating artificial green walls?
Check out green wall selection guides online. Many companies offer DIY guides on their websites. You can also find inspiration on social media platforms like Instagram and Facebook.