
Concrete bowls are experiencing a surge in popularity, not only for their functionality but also for their versatile aesthetic appeal. Whether you’re looking to add a minimalist touch to your decor or seeking durable vessels for your garden, concrete bowls fit the bill. These sturdy items are more than just visually pleasing; they offer a unique blend of practicality and modern design that can be tailored to suit various tastes and styles.

With the ability to customise your own concrete bowl, the DIY approach has gained traction amongst craft enthusiasts and interior designers alike. This hands-on process allows you to create a piece that is truly one-of-a-kind, and can be used for an array of purposes – from a chic container for your fruit to a rustic pot for plants. Caring for concrete bowls is straightforward, keeping them looking pristine with minimal effort.
Key Takeaways
- Concrete bowls blend durability with modern design, suitable for various decor styles.
- You can craft personalised concrete bowls at home using simple DIY techniques.
- These bowls demand minimal maintenance for long-lasting use in any setting.
Understanding Concrete Bowls
Creating concrete bowls is a satisfying DIY task that delivers functional and stylish outcomes. When you understand the essentials, you’re all set to make your own custom pieces for your home or garden.
Materials and Mixes
For your concrete bowl project, you will need cement mix, water, and a mixing bucket. A common ratio is a mix of one part water to four parts concrete mix, which is ideal for bowls. Consistency matters; aim for a mixture resembling thick porridge. It should hold its shape without being overly wet or dry. If you’re looking for detailed instructions on mixes and materials, this guide to making concrete bowls is a great resource.
- Cement Mix: Use a fine grain mix for a smoother finish.
- Aggregates: Add if using a basic mix to enhance texture.
- Water: Start with less and add gradually to achieve the desired consistency.
Manufacturing Techniques
The basic technique involves pouring your concrete mix into a mould, which is commonly another larger bowl. To ensure easy removal, coat the inside of your outer bowl with a non-stick spray. Center a smaller bowl inside to create the cavity, and weigh it down to prevent it from rising. A vital trick is to twist and press if using a ball as a mould insert, as described in this Instructables guide.
- Moulding: Use two bowls, with cooking spray as a release agent.
- Curing: Allow time for the concrete to set properly before demoulding.
- Finishing: Sand rough edges for a clean look.
Designing Concrete Bowls
When creating your own concrete bowls, considering both aesthetics and practicality is essential to achieving a functional yet stylish piece.
Form and Function
Your concrete bowl’s shape and size directly influence its utility. Think about the bowl’s purpose before you start. For serving food, smooth inner surfaces work best, while decorative bowls afford more creative freedom with textures and edges. Utilise moulds like existing bowls or DIY forms made from sand or carved foam to dictate your bowl’s form.
Colour and Texture Choices
Colour adds personality, and texture creates a tactile experience. Integrating pigments into your concrete mix can transform your bowl from a mere container into a statement piece. Options include natural grey, terracotta hues, or even bold colours. If you’re after a simplified approach, Grey Snail Designs offers insights into the appeal of minimalist colour palettes. Textures can range from polished smoothness to a rugged, unfinished look. Instructables provides guidance on adding textures, such as using a textured ball for creating patterns.
DIY Concrete Bowl Creation
Creating a concrete bowl at home is a simple project that can add a unique and customisable touch to your decor. Following these steps carefully will ensure your bowl is both sturdy and stylish.
Preparation and Safety
Before starting your project, ensure you’re in a well-ventilated area and wearing protective gear, including gloves, eyewear, and a dust mask. Gather all your materials, like cement mix, water, moulds, and any decorations you plan to use. It’s essential to have a clean workspace and to protect surfaces with a drop cloth or plastic sheeting.
Moulding and Setting
Begin by mixing your concrete following the manufacturer’s instructions to achieve a consistent and lump-free mix. For moulding, you can use a variety of items like old containers or bowls. Apply a release agent like cooking oil to the inside of your outer mould and the outside of your inner mould before filling.
Pour the mix into the outer mould and then press the smaller mould inside, weighted with stones or sand to keep it in place. Ensure the edges of your bowl have an even thickness for uniform drying and strength. Allow the concrete to set as per the mix’s drying time, usually a day or two.
Finishing Touches
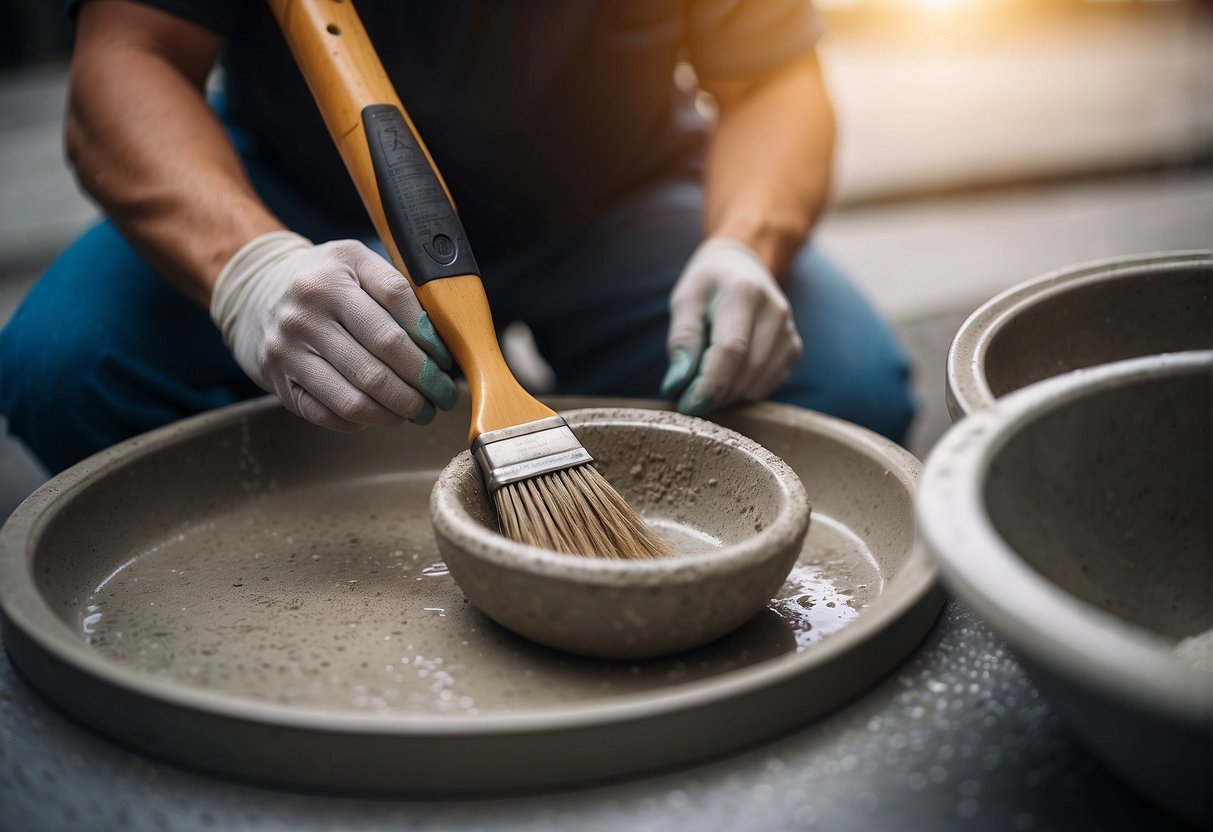
Once your bowl has set and cured, gently remove it from the moulds. You might need to sand any rough edges to smooth them out and possibly seal the bowl if you intend to use it for plants. Customise your bowl by painting it, adding mosaic tiles, or leaving it natural for an industrial look. Remember, the more details you add, the more you’ll make the piece your own.
Usage and Applications

Concrete bowls are dynamic in their utility, serving as stylish accents in your home and as durable containers for your garden. Their versatility makes them a popular choice for both indoor and outdoor settings.
Home Decor
Concrete bowls add a modern touch to any room. Their industrial aesthetic pairs well with a variety of decors, from minimalist to rustic. Use them to hold keys and coins on your hallway table, or fill them with decorative stones and succulents for a centrepiece on your coffee table. Need inspiration? These simple poured concrete vessels are a testament to the beauty and simplicity of concrete in home décor.
Gardening Purposes
For gardening, concrete bowls are excellent as planters. They provide ample space for root growth and stand up well against the elements outdoors. Create a small herb garden or a succulent arrangement for a touch of greenery. For a comprehensive guide, explore how to make your own concrete bowls that can be customised for any plant or setting.
Maintenance and Care

When you’ve invested in a concrete bowl, whether for landscaping or as a striking piece in your home, keeping it in splendid condition is simpler than you might expect. Your low-maintenance and durable concrete bowl will last for years with appropriate care.
Daily Care
- Cleaning: A gentle dusting or wipe down with a soft cloth will do the trick for daily grime.
- Spills: Tackle any spills swiftly with a non-abrasive cloth to prevent stains.
Routine Maintenance
- Sealing: Although not always necessary, as some products from Mitchell Bink Concrete Design are sealed prior to leaving the workshop, check if your bowl requires sealing to maximise protection.
- Recoating: Depending on the product and environment, a periodic reseal may be beneficial. Consult with your supplier for recommendations.
Preventative Measures
- Heat and Sunlight: Avoid placing your bowl in areas that receive excessive sunlight or heat to minimise potential fading or thermal shock.
- Heavy Objects: Steer clear of placing heavy objects in or on your bowl that could cause cracks or chips.
Treating Wear and Tear
Even with the best care, minor scratches or wear might appear over time.
- Minor scratches can often be buffed out gently with a fine-grade sandpaper.
- For more substantial damage, it might be worth consulting with a professional.
By following these straightforward guidelines, your concrete bowl will maintain its character and quality, becoming even more beautiful as it ages naturally.
Frequently Asked Questions
If you’re keen on exploring concrete as a medium or you need advice on purchasing, this section helps answer some common inquiries about concrete bowls.
How can I create a concrete bowl at home?
You can make a stunning DIY concrete bowl by preparing a mould, mixing concrete, and following the right steps for pouring and setting. Sanding the edges once it’s dry gives it a smooth finish.
What’s the ideal cement mixture for crafting pots?
The perfect mix for concrete pots should resemble thick pancake batter, ensuring it’s lump-free for an even result. Adjust the mix with water or dry concrete to achieve the right consistency.
Where can I find large concrete bowls for outdoor decoration?
Large concrete bowls for outdoor spaces can be found at garden centres or specialised retailers. For a wide selection, Pots Wholesale Direct provides various options available for delivery Australia-wide.
Are there any special techniques for making DIY concrete planters?
When making DIY concrete planters, it’s important to use a release agent on the moulds and consider adding reinforcement, like mesh, for increased strength. You can also experiment with decorative aggregates for unique textures.
How durable are concrete bowls when used as dog feeding stations?
Concrete bowls are highly durable and resist tipping over, making them ideal for use as dog feeding stations. Ensure they’re sealed properly to prevent porosity and protect against stains.
Can I purchase concrete bowls at local Australian home improvement stores?
Yes, concrete bowls are commonly available at home improvement stores across Australia. For a leisurely look, visit your local Bunnings Warehouse or check online marketplaces for a variety of artisanal options.