
G’day, fellow camellia enthusiasts! Growing these beauties in Oz can be a bit of a challenge, can’t it? Many of us have battled with yellowing leaves, sunburnt plants, and flowers that refuse to open.
It’s enough to make you want to chuck in the towel sometimes.
But don’t worry, mate – we’ve been there too. After plenty of trial and error, we’ve discovered that camellias need some special TLC to really thrive in our Aussie conditions. For instance, they’re pretty fussy about their soil, preferring it slightly acidic with a pH between 5.5 and 6.5.
We’ve done our homework and dug deep into camellia care to find solutions for all those pesky problems.
So, if you’re keen to become a fair dinkum camellia expert, you’ve come to the right place. We’ll walk you through everything from picking the right variety for your garden to creating the perfect growing conditions.
We’ll cover all the nitty-gritty details, from planting tips to keeping those nasty pests at bay. Ready to give it a burl?
Key Takeaways
- Camellias thrive in cool to sub-tropical Aussie climates, preferring acidic soil with a pH of 5.5 to 6.5.
- Plant camellias in spring or autumn in well-drained spots with dappled sunlight, using Yates Dynamic Lifter to improve soil.
- Water deeply 2-3 times weekly during the first growing season and feed every 8 weeks with Yates Thrive Natural Roses & Flowers Plant Food.
- Prune after flowering ends, removing no more than one-third of the plant yearly to maintain health and shape.
- Treat common issues like aphids and scale with Yates Scale Gun, and use Yates DroughtShield to protect against harsh sun.
Selecting the Right Camellia Variety

Choosing the right camellia variety is key to success in your garden. We’ll guide you through the main types of camellias that thrive in Australia’s climate.
Japonica Camellias
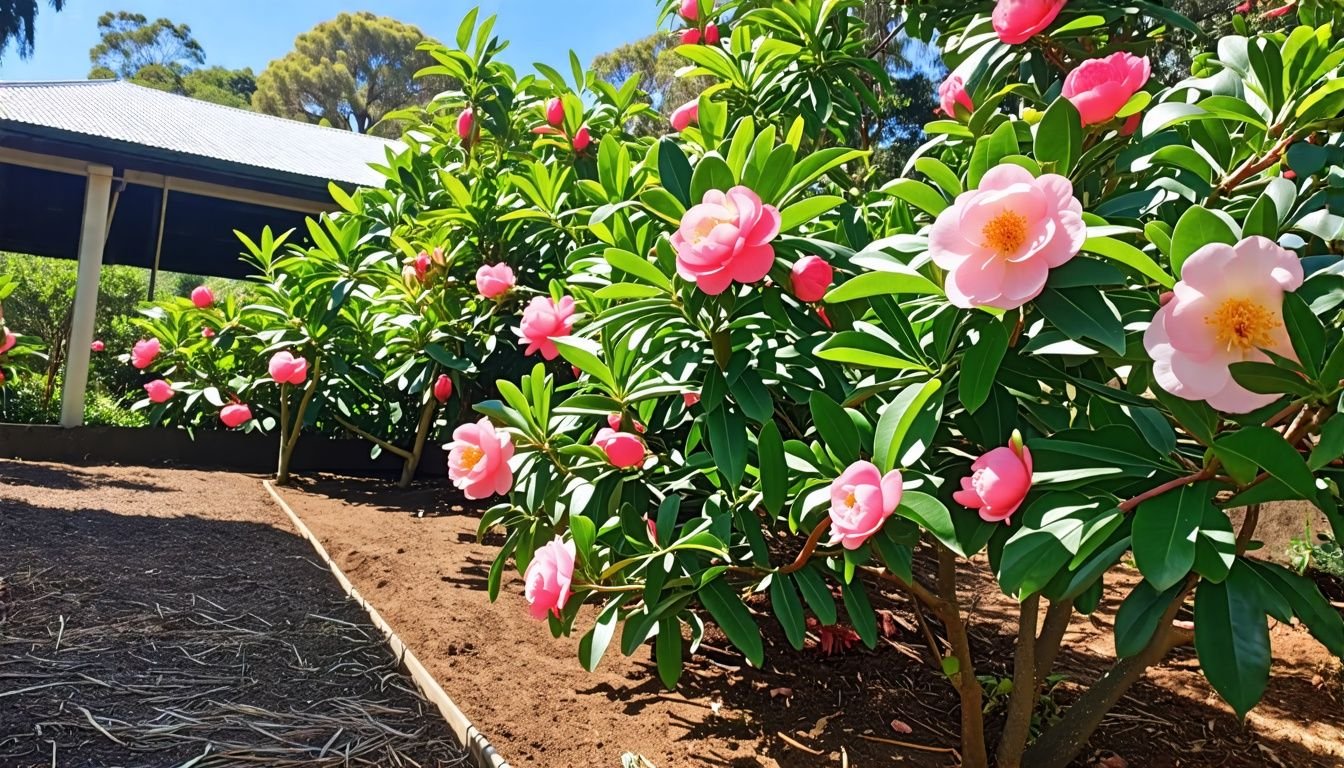
Japonica Camellias are a true gem in Australian gardens. We love these beauties for their stunning blooms and glossy green leaves. They flower from late autumn to early spring, adding colour to our yards when other plants are dormant.
These evergreen shrubs can grow up to 4-5 metres high and 4 metres wide, making them perfect for hedges or feature plants.
We find that Japonica Camellias thrive in dappled shade, which mimics their natural habitat. Their dark green foliage stays lush all year round, providing a great backdrop for the showy flowers.
With over 2,000 named cultivars, we have many options for flower colours and shapes. One standout variety is ‘Leonard Messel’, which has earned the Royal Horticultural Society’s Award of Garden Merit.
Camellias are the queens of the winter garden, bringing elegance and charm to any landscape.
These acid-loving plants prefer well-drained soil with a pH between 5.5 and 6.5. We recommend using organic mulch to keep the soil moist and cool. Regular pruning after flowering helps maintain their shape and encourages new growth.
With proper care, Japonica Camellias can live for decades, becoming cherished fixtures in our Australian gardens.
Sasanqua Camellias
Moving on from Japonica Camellias, we’ll explore another stunning variety: Sasanqua Camellias. These beauties are the first to bloom in autumn, bringing colour to our gardens as the weather cools.
Sasanqua Camellias are tough plants that thrive in part shade to full sun, making them perfect for many Australian gardens.
We love Sasanqua Camellias for their versatility. They grow into medium-sized shrubs or small trees, reaching 3-6 metres high and 4 metres wide. This makes them great for hedging or as feature trees in your yard.
If you’re after something smaller, don’t worry. Dwarf and groundcover forms are also available, giving you plenty of options for your garden design.
One standout Sasanqua Camellia is the ‘Freedom Bell’ cultivar. It’s earned the Royal Horticultural Society’s Award of Garden Merit, a sign of its top-notch performance. These plants are drought-tolerant once established, which is a big plus for our often dry climate.
With their hardy nature and beautiful blooms, Sasanqua Camellias are a smart choice for Aussie gardeners looking to add year-round interest to their outdoor spaces.
Reticulata Camellias
Reticulata Camellias are the showstoppers of the camellia world. We love these beauties for their massive blooms, which can reach up to 15 cm across. They’re perfect for Aussie gardens, thriving in our mild climates.
These plants grow into small trees, reaching heights of 3-5 metres, making them ideal feature plants.
We’ve found that Reticulata Camellias bloom later than their cousins, typically from late winter to mid-spring. They offer a stunning array of colours, from deep reds to soft pinks and pure whites.
With over 400 named cultivars, we’re spoilt for choice. The ‘Tom Knudsen’ variety even nabbed the prestigious RHS Award of Garden Merit, proving its worth in gardens worldwide.
Camellia Tea Plant
Camellia sinensis, the tea plant, is a star in the camellia family. We love this versatile shrub for its dual purpose in Australian gardens. It grows into a lovely hedge or screen, reaching 1-2 metres high and wide.
But its real claim to fame? Those tender leaf tips make the world’s most popular drink.
Tea lovers, rejoice! This plant is the primary source of black, green, and oolong teas. In Japan, they also use its leaves for tea making. Another cousin, Camellia oleifera, gives us tea seed oil.
Here’s a fun fact from tea expert Jane Pettigrew:.
A single tea plant can produce tea for over 100 years, with some plants living well beyond 1,500 years.
Ideal Planting Conditions
Camellias thrive in specific conditions that mimic their natural habitat. We’ll guide you through the best climate and soil types for these beautiful plants. Read on to learn how to create the perfect home for your camellias.
Best Climate for Growing Camellias
We love growing camellias in Australia because they thrive in our cool to sub-tropical climates. These beautiful plants prefer areas with mild temperatures and moderate rainfall. In most parts of our country, camellias flourish in spots that offer part shade with some full sun exposure.
For our mates in sub-tropical regions, we recommend sun-hardy sasanqua camellias. These tough varieties can handle more direct sunlight and warmer conditions. It’s worth noting that some Vietnamese camellia species even grow well in low-water environments, making them a great choice for drier areas.
Our ideal planting times span the whole year, but spring and autumn are the best seasons to get your camellias in the ground. Next, let’s explore the soil types that will help your camellias thrive and how to adjust the pH if needed.
Suitable Soil Types and pH Adjustments
Moving from climate considerations, let’s dig into the soil needs of camellias. These plants thrive in well-drained, moist, and acidic soil. The ideal mix is rich in organic material with a pH between 5.5 and 6.5.
For gardens with heavy clay or poor drainage, we suggest planting in a raised mound about 20 cm high.
The right soil is the foundation of a healthy camellia.
If your soil is too alkaline (pH above 7), don’t fret. We can lower the pH using Yates Soil Acidifier Liquid Sulfur. To enrich the soil, Yates Dynamic Lifter Soil Improver & Plant Fertiliser works wonders.
These steps will create the perfect home for your camellia to flourish in your Australian garden.
Planting Techniques
We’ll guide you through the best ways to plant your camellia. Our tips cover the right time to plant, how to prep your garden, and the steps to get your camellia in the ground. Read on to learn the tricks that will help your camellia thrive from day one.
Optimal Planting Times
Planting camellias at the right time is key to their success in Australian gardens. We’ve found that these beauties thrive when planted year-round, but spring and autumn offer the best conditions.
During these seasons, the soil warms up and the air cools down, creating an ideal environment for new roots to establish.
For those looking to transplant existing camellias, we recommend doing so between the end of flowering and mid-spring. This timing allows the plant to settle in before the next flowering season begins.
Japonica camellias start their bloom in late autumn, while Sasanquas kick off the show in mid-autumn. With a growth rate of about 30 cm per year, these plants will soon become stunning features in your garden.
Our experience shows that aligning planting with cooler weather gives camellias the best start. This approach helps reduce transplant shock and allows the plant to focus on root development rather than fighting heat stress.
As flowering periods extend into the cooler months, early planting ensures your camellia is well-established and ready to put on a spectacular display when the time comes.
Preparing the Planting Site
We’re excited to help you prepare the perfect spot for your camellia plants. Let’s get your garden ready for these beautiful blooms with our step-by-step guide.
- Choose the right location: Pick a well-drained area with dappled sunlight. Camellias thrive in spots that get morning sun and afternoon shade.
- Test the soil: Check your soil’s pH level. Camellias love acidic soil with a pH between 5.5 and 6.5.
- Improve the soil: Mix Yates Dynamic Lifter Soil Improver & Plant Fertiliser into your topsoil. This will boost nutrients and help with drainage.
- Create a raised mound: For heavy or clay soil, build a 20 cm high mound. This prevents waterlogging and keeps roots happy.
- Dig the hole: Make it twice as wide as the root ball but keep the same depth. This gives roots room to spread out.
- Add organic matter: Mix compost or well-rotted manure into the soil you’ve dug out. This feeds your camellia and improves soil structure.
- Form a water ring: Shape the soil around the planting area into a doughnut. This helps direct water to the roots and stops runoff.
- Mulch the area: Spread a 5-7 cm layer of organic mulch around the planting site. Leave a gap near the stem to prevent rot.
Step-by-step Planting Process
Now that we’ve prepared the planting site, let’s move on to the actual planting process. We’ll guide you through each step to ensure your camellia gets the best start in its new home.
- Dig a hole twice as wide and deep as the root ball.
- Position the camellia in the hole, keeping the top of the root ball level with the soil surface.
- Backfill with enriched soil, gently firming it around the roots.
- Water thoroughly to settle the soil and remove air pockets.
- Apply a 5-7 cm layer of organic mulch around the root zone, avoiding contact with the trunk.
- Keep the soil moist for several weeks after planting.
- Water deeply 2-3 times a week during the first growing season.
- Monitor the plant for signs of stress or yellowing leaves, which may indicate iron deficiency.
- Prune lightly in the first year to shape the plant and promote bushiness.
- Protect young plants from harsh sun and strong winds until they’re established.
Ongoing Care and Maintenance
Camellias need regular care to thrive in Australian gardens. We’ll guide you through watering, feeding, and pruning to keep your plants healthy and beautiful.
Watering Requirements
We’ve found that camellias thrive with regular watering. Our plants need about 2-3 waterings per week, especially when they’re settling in. We make sure to keep the soil moist but not waterlogged.
Deep watering helps us achieve this balance, encouraging strong root growth.
Checking soil moisture is a key part of our routine. We stick our fingers into the soil to feel its dampness. This simple test helps us avoid both over and under-watering, which can stress our camellias.
To retain moisture, we apply a layer of organic mulch around the base of our plants.
Our watering habits change with the seasons. In summer, we water more often to combat heat and dryness. During cooler months, we reduce watering frequency but still keep an eye on soil moisture.
This approach helps our camellias stay healthy year-round, producing those stunning blooms we love.
Feeding and Fertilisation Practices
Camellias thrive with proper nutrition. We feed our plants every eight weeks using Yates Thrive Natural Roses & Flowers Organic Based Pelletised Plant Food. This balanced formula supports healthy growth and abundant blooms.
For potted camellias, we apply Yates Thrive Natural Roses & Flowers Concentrate every one to two weeks.
Nutrient deficiencies can affect camellia health. Yellow leaves often signal a lack of nitrogen, which we correct with Yates Thrive Natural Roses & Flowers Liquid Concentrate. Iron deficiency causes leaf yellowing between green veins.
We treat this with Yates Leaf Greener Iron Chelate. Magnesium shortages lead to leaf discoloration, remedied by Yates Leaf Greener Magnesium Chelate.
Regular feeding keeps our camellias robust and flowering beautifully. We adjust our fertilisation schedule based on soil type, plant size, and growing conditions. Careful observation helps us spot and address nutrient issues promptly, ensuring our camellias remain healthy year-round.
Pruning for Health and Aesthetics
Pruning camellias keeps them healthy and beautiful. We’ll share our top tips for pruning these lovely plants.
- Timing matters: Prune right after flowering ends. This gives the plant time to grow new buds for next season.
- Clean tools: Use sharp, clean pruning shears. Wipe them with rubbing alcohol between cuts to stop disease spread.
- Remove dead wood: Cut out any brown, dry, or diseased branches. This helps air flow and plant health.
- Shape the plant: Trim long, straggly branches to keep a nice form. Cut back to a leaf or bud facing the direction you want growth.
- Thin crowded areas: Take out some inner branches to let light and air reach the centre. This prevents fungal issues.
- Don’t over-prune: Remove no more than one-third of the plant in a year. Too much pruning stresses the camellia.
- Encourage new growth: Cut back old wood to promote fresh shoots. This keeps the plant bushy and full.
- Mind the buds: Avoid cutting off next year’s flower buds. They form on branch tips after blooming.
- Prune for size control: Trim tall branches to keep your camellia at the desired height. This works well for c. sasanqua varieties.
- Deal with frost damage: Cut away any branches harmed by cold weather. This stops decay from spreading.
Addressing Common Problems
Camellias can face several issues that affect their health and beauty. We’ll guide you through common problems like pests, diseases, and environmental stress. Our tips will help you keep your camellias thriving and blooming year after year.
Managing Pests and Diseases
We’ve observed that pests and diseases can be challenging for camellia enthusiasts in Australia. Aphids, small sap-sucking insects, appear in various colours such as grey, green, brown, yellow, or black.
Scale insects manifest as raised bumps on leaves or stems. Sticky leaves with black sooty mould often indicate the presence of both aphids and scale.
We have a straightforward solution for these issues. Use Yates Scale Gun and apply it weekly as required. This treatment effectively removes these pests from your cherished camellias.
We suggest monitoring for bronze discolouration on leaves, which indicates Camellia Tea Mite. Unfortunately, there’s no remedy for camellia virus, causing mottled and deformed leaves and flowers.
If you notice this, we suggest promptly pruning infected stems. We advise cleaning your tools after each cut to prevent spreading the virus.
Dealing with Yellow Leaves and Sunburn
After tackling pests and diseases, we’ll now address yellow leaves and sunburn in camellias. These issues often stem from nutrient deficiencies or excessive sun exposure.
Yellow leaves can signal different problems. Mostly yellow leaves point to a lack of nitrogen. We fix this with Yates Thrive Natural Roses & Flowers Liquid Concentrate. Yellow leaves with green veins suggest an iron shortage.
For this, we use Yates Leaf Greener Iron Chelate. Regular soil pH checks help prevent these issues.
Sunburn damages camellia leaves and flowers. We protect our plants with Yates DroughtShield. This leaf protectant costs $14.38 for a 750mL bottle. It shields camellias from harsh Aussie sun and reduces water loss.
Our camellias stay healthy and vibrant with these simple steps.
Preventing Bud Drop and Non-opening Flowers
We’ve found that bud drop and non-opening flowers often stem from watering issues or nutrient gaps. To prevent these problems, we check soil moisture levels regularly and feed our camellias with Yates Thrive Natural Roses & Flowers Concentrate.
This blend gives our plants the food they need to grow strong and healthy.
Magnesium plays a key role in flower bud health. We use Yates Leaf Greener Magnesium Chelate to boost this vital nutrient. Steady care is crucial to avoid stress-induced bud drop. We keep a close eye on our watering habits and adjust as needed.
Next, let’s explore how to tackle common pests and diseases that might threaten your camellia’s health.
Conclusion
Growing camellias in Australia can be a joy for any garden lover. We’ve shared tips on choosing the right variety, planting, and caring for these beautiful flowers. With proper care, your camellias will thrive and bring colour to your garden for years.
Be sure to water, feed, and prune your plants as needed. Happy gardening, and enjoy the stunning blooms of your camellias!
FAQs
1. What types of camellias grow well in Australia?
Camellia japonica and Camellia sasanqua thrive in Australian gardens. These broadleaf evergreens belong to the Theaceae family. Many commercial cultivars exist, thanks to selective breeding. C. sinensis, known for its tea leaves, also grows well in certain regions.
2. How do I prepare the soil for camellia plants?
Camellias prefer acid soils. Test your soil’s acidity before planting. If it’s alkaline, amend it with organic matter like bark or specialised potting mix. Ensure good drainage to prevent water stress. Remove weeds and add appropriate fertilisers to boost plant nutrition.
3. What are common problems affecting camellia plants?
Petal blight, leaf spot, and dieback can trouble camellias. Powdery mildew and honeydew from pests may also occur. Regular checks help catch issues early. Proper care, including balanced watering and feeding, can prevent many problems.
4. How do I propagate camellia plants?
Air layering is an effective method for propagating camellias. You can also grow them from cuttings or seeds. However, seeds may not produce plants identical to the parent. Pollinated flowers form seeds, but cultivar names won’t carry through to offspring.
5. Are camellias drought tolerant?
While established camellias can withstand short dry spells, they aren’t truly drought tolerant. Regular watering is crucial, especially during dry periods. Mulching helps retain soil moisture. C. oleifera is known to be more drought-resistant than other species.
6. Can camellias be grown as houseplants?
Camellias can be grown indoors with proper care. They need bright, indirect light and consistent moisture. Use a well-draining potting mix and maintain high humidity. Regular pruning keeps them compact. Not all varieties suit indoor conditions, so choose wisely.