
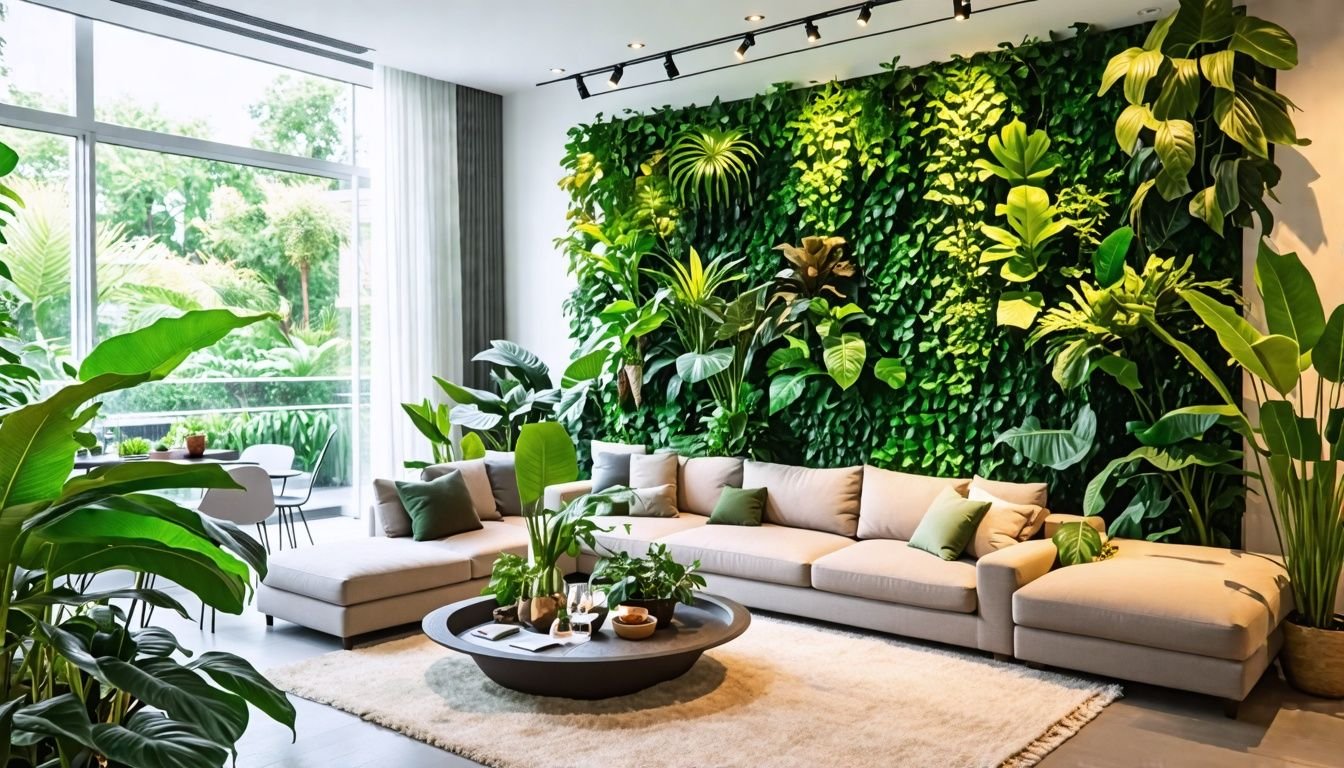
G’day, mates! Ever dreamt of having a lush, green oasis in your home, but reckon you lack the green thumb to keep real plants alive? No worries, you’re not alone. Many of us have had a go at maintaining living plants indoors, only to watch them wither away.
That’s why we’ve turned our attention to artificial plant walls as a bonzer solution.
We’ve done our fair dinkum research on this topic. Did you know that artificial plant walls can last up to 10 years with proper care? They offer the beauty of nature without all the fuss.
In this guide, we’ll show you how to create a ripper artificial plants wall in your indoor space. We’ll cover everything from choosing the right plants to installation and maintenance.
So grab a cuppa and get ready to transform your home into a green paradise that’ll be the envy of the neighbourhood.
Key Takeaways
- Artificial plant walls can last up to 10 years with proper care, offering a low-maintenance green solution for indoor spaces.
- UV-resistant plants and panels are crucial for longevity, with options like RealTex materials that resist fading and cracking under direct sunlight.
- Standard 1m x 1m panels, such as the Artificial Lush Forest ($349.95) or Artificial Deluxe Buxus Hedge ($94.95), offer versatility for most indoor spaces.
- Regular dusting with a soft cloth and occasional cleaning with mild soap and water keep artificial plant walls looking fresh and vibrant.
- Mixing plant varieties, like the Artificial Flowering Buxus Hedge ($89.95) and Artificial Jasmine Hedge ($79.95), creates visual impact and mimics natural diversity.
Choosing the Right Artificial Plants for Your Wall

We must pick the right plants for our artificial wall. Our choices will shape the look and feel of our space.
Consider plant types and colours
We love creating stunning artificial plant walls for our indoor spaces. Choosing the right plant types and colours is key to making a wall that looks amazing. Our top picks include artificial ivy, garlands, vines, and bushes.
These plants offer a lush, green look that can brighten up any room.
For a pop of colour, we often add artificial flowering plants and stems or ferns. These come in many shades and can create a vibrant, eye-catching display. We’ve found that mixing different plant types creates a more natural and interesting look.
Our Coastal Greenery style, priced at $149.95, is perfect for a beachy vibe. The Yellow Tropics style, also $149.95, adds a sunny, tropical feel to any space.
Custom tall trees and plant bundles are great for adding height and depth to our artificial plant walls. These larger pieces can serve as focal points, drawing the eye and creating visual interest.
We always make sure to choose UV-resistant plants for longevity. This ensures our fake green walls stay looking fresh and vibrant for years to come, even in sunny spots.
Evaluate UV resistance and durability
We know the harsh Australian sun can wreak havoc on outdoor plants. That’s why UV resistance is crucial for artificial plants in our vertical gardens. Our RealTex materials stand up to intense sunlight, keeping colours vibrant for years.
These tough leaves won’t fade or crack, even under direct rays.
Durability matters just as much as UV protection. Our panels come with a 5-year warranty, proving their long-lasting quality. They resist wear and tear from daily life, staying lush and green without constant upkeep.
This resilience makes them perfect for busy Aussie households or commercial spaces.
Our artificial plants bring the beauty of nature indoors, without the worry of sun damage or constant care.
We’ve designed these plants to thrive in our unique climate conditions. From scorching summers to dry spells, they maintain their fresh look year-round. This means less time fussing over plant care and more time enjoying your stunning green wall.
Designing Your Artificial Plant Wall
We plan our artificial plant wall with care and creativity. Our design focuses on balance, texture, and colour to create a stunning visual impact.
Layout planning and design aesthetics
We plan our artificial plant wall with care and creativity. Our layout should balance different plant types and colours for a natural look. We might choose a tropical theme with lush greens or a classic forest feel with varied leaf shapes.
Dense, botanically accurate plants work best for a realistic effect. We can mix up the design with options like our Vertical Garden of Eden or Green Meadows panels.
Our wall’s design should fit our space and style. We think about the room’s size, light, and existing decor. A feature wall needs bolder plants, while a subtle backdrop calls for softer tones.
We can add depth by layering plants of different sizes. Lighting can enhance the mood, making our green wall a true focal point in any Aussie home.
Selecting the right size panels
Choosing the right size panels for your artificial plant wall is crucial. We recommend starting with the standard 1 metre by 1 metre panels. These panels offer great versatility and can fit most indoor spaces.
Our Artificial Lush Forest panel, priced at $349.95, provides a lush, green backdrop that suits many room sizes.
For smaller areas or accent walls, you might want to consider cutting the panels to size. The modular nature of these panels allows for easy customisation. If you’re after a more subtle look, our Artificial Deluxe Buxus Hedge panel at $94.95 could be perfect.
It’s ideal for creating a clean, structured appearance in compact spaces.
We always suggest measuring your wall space before purchasing. This helps ensure you order the right number of panels for full coverage. Keep in mind that you can mix and match different panel types to create a unique look.
The key is to plan your layout carefully, considering the overall design and the specific dimensions of your space.
Essential Tools and Materials
We need the right gear to create a stunning artificial plant wall. Our toolkit must include sturdy mounting brackets and durable backing panels to support the plants.
Mounting hardware
We’ll need sturdy mounting hardware to create a lasting artificial plant wall. Our go-to options include heavy-duty brackets, wall anchors, and screws. These tools ensure our green masterpiece stays put for years to come.
For added peace of mind, we always check the weight limits of our chosen hardware against the total mass of our plant panels.
Our installation guides offer step-by-step help for securing panels safely. Plus, our support team stands ready to answer any questions about proper mounting techniques. With the right gear and know-how, we can transform bare walls into lush, UV-resistant gardens that never need pruning.
Backing materials
Backing materials play a crucial role in creating a sturdy artificial plant wall. We need to choose materials that can support the weight of our plant panels and withstand the test of time.
Plywood, MDF boards, or lightweight foam panels serve as excellent options for indoor use. These materials offer the right balance of strength and ease of installation.
For our Australian climate, we must consider UV-resistant backing materials. This ensures our plant wall stays vibrant even when exposed to sunlight through windows. Premium Natural Buxus Hedge Panels and Jungle Fern panels, measuring 1m x 1m, are great choices for a lush look.
These panels now cost $79.95 and $149.95 respectively, offering good value for money.
A strong foundation is the key to a lasting artificial plant wall.
Next, let’s explore the essential tools and materials needed for our project.
Step-by-Step Installation Process
We’ll guide you through the installation process step by step. Our clear instructions will help you create a stunning artificial plant wall with ease.
Preparing the installation area
We’re ready to set up our stunning artificial plant wall. Let’s start by preparing the installation area properly.
- Clean the wall surface thoroughly. Remove any dust, dirt, or debris with a damp cloth and allow it to dry completely.
- Measure the space accurately. Use a tape measure to get precise dimensions for fitting panels like the 100cm x 100cm Artificial Spring Fern.
- Mark the mounting points. Use a pencil to lightly mark where you’ll attach the panels or mounting hardware.
- Check for level. Use a spirit level to ensure your markings are straight and even.
- Gather your tools. Have a drill, screwdriver, and appropriate screws or anchors ready for the installation process.
- Protect the floor. Lay down a drop cloth or old sheet to catch any debris during installation.
- Ensure proper lighting. Set up good lighting to see clearly while you work on your new plant wall.
- Prepare your panels. Unpack your chosen panels, like the Artificial Red Tropics, and arrange them in your planned layout.
Next, we’ll move on to the actual mounting process for your artificial plant wall.
Mounting panels and securing plants
We’re ready to bring your artificial plant wall to life. Let’s walk through the process of mounting panels and securing plants to create a stunning green feature.
- Prepare the wall surface: Clean the area and mark mounting points for panels.
- Install mounting brackets: Use sturdy hardware to attach brackets securely to the wall.
- Attach panels to brackets: Carefully hang each panel, ensuring it’s level and stable.
- Arrange plants on panels: Lay out your chosen plants for an even, natural look.
- Secure plants to panels: Use zip ties or wire to fasten plants firmly in place.
- Check UV resistance: Confirm all plants are UV resistant for long-lasting beauty.
- Fill gaps between panels: Add extra foliage to create a seamless appearance.
- Test panel stability: Gently shake each panel to ensure all plants are secure.
- Adjust plant positions: Fine-tune the arrangement for the best visual impact.
- Step back and assess: View your wall from different angles to spot any bare patches.
Our next step focuses on maintaining your new green masterpiece. Let’s explore some easy care tips to keep your artificial plant wall looking fresh and vibrant.
Maintenance and Care Tips
Keeping your artificial plant wall fresh and vibrant is easy. Regular dusting and occasional cleaning will maintain its beauty for years to come.
Cleaning and dusting techniques
We know keeping artificial plants clean is key to their lasting beauty. Regular dusting helps our green walls stay fresh and vibrant. We use a soft, dry cloth or feather duster to gently wipe away dust from leaves and stems.
For stubborn dirt, we opt for a slightly damp cloth. This method works well for most artificial plants, including our popular Artificial Laurel Hedge and Fern Vertical Garden panels.
For a deeper clean, we’ve found a mix of warm water and mild soap does wonders. We avoid harsh chemicals that might damage the plants’ colours or textures. After cleaning, we always dry the plants thoroughly to prevent water spots.
This care routine keeps our artificial plant walls looking their best, just like the day we installed them.
Long-term care for durability
After mastering cleaning techniques, we’ll focus on long-term care for your artificial plant wall. This step ensures your green oasis stays fresh and vibrant for years to come.
Our artificial plant walls need regular check-ups to maintain their beauty. We inspect each panel monthly, looking for loose plants or fixtures. If we spot any issues, we fix them right away.
This prevents small problems from becoming big headaches later on. For example, we make sure our Dark Moss Green Wall Panels ($129.95 per 1m x 1m) stay firmly attached to the wall.
To keep our plant wall looking its best, we rotate panels every six months. This spreads wear evenly across all parts of the display. We also treat our plants with a UV-resistant spray yearly.
This extra step guards against fading, especially for walls near windows. By following these simple care tips, our artificial plant wall remains a stunning focal point in our indoor space.
Creative Design Ideas
We love to mix things up with our artificial plant walls. Try combining different leaf shapes and sizes for a lush, varied look. Add some sparkle with fairy lights or spotlights to create a magical glow after dark.
Mixing plant varieties for visual impact
We love to mix different plant varieties for a stunning visual impact on our artificial plant walls. Our go-to combo includes the Artificial Flowering Buxus Hedge and Artificial Jasmine Hedge.
These two create a layered look with contrasting colours and textures. The Buxus Hedge, now $89.95, offers a lush green backdrop. The Jasmine Hedge, priced at $79.95, adds a touch of delicate white flowers.
Together, they form a eye-catching display that mimics nature’s diversity.
To boost the visual appeal, we add pops of colour with artificial flowering plants. Faux succulents bring in unique shapes and sizes. We also play with different leaf sizes and shapes to create depth.
This mix of plant types tricks the eye, making the wall look more natural and alive. The result? A striking focal point that brings life to any indoor space without the fuss of real plants.
Incorporating lighting for enhanced ambiance
Lighting plays a key role in making our artificial plant wall stand out. We can use LED lights to highlight certain areas and create a warm, inviting atmosphere. These lights come in different colours and styles, letting us set the mood we want.
For example, we might place soft white lights behind ferns to cast gentle shadows, or use coloured lights to make specific plants pop.
Our artificial plant wall becomes a focal point when we add the right lighting. We can install strip lights along the edges or use spotlights to draw attention to special features.
Some artificial plants, like our Ivy Leaf Hedge, look great with hidden lights that make them glow from within. This trick adds depth and makes the wall look more alive, even at night.
Conclusion
Creating a stunning artificial plants wall brings life to any indoor space. We’ve shared tips on choosing plants, designing layouts, and installing your green masterpiece. With proper care, your new wall will stay fresh and vibrant for years.
This project offers a fun way to express your style and connect with nature. Your indoor oasis awaits – start planning your artificial plants wall today!
FAQs
1. What are the key specifications for creating an artificial plants wall?
The main specifications for an artificial plants wall include choosing the right wall space, selecting a mix of faux plants, and using a sturdy mounting system. You’ll need to consider the wall size, lighting conditions, and your desired look. Pick plants that suit your style and match your indoor décor.
2. How do I maintain an artificial plants wall compared to real houseplants?
Artificial plants walls require much less maintenance than living houseplants. You won’t need to water, prune, or fertilise them. Regular dusting and occasional cleaning with a damp cloth will keep your faux plants looking fresh. This low-maintenance option is perfect for busy homeowners or those without a green thumb.
3. Can I mix artificial and real plants on my wall?
Yes, you can create a stunning wall by mixing artificial and real plants. This approach gives you the best of both worlds. Use hardy, low-maintenance real plants alongside artificial ones for a more natural look. Remember to place the real plants where they can receive proper care and sunlight.
4. What tools do I need to install an artificial plants wall?
To install your artificial plants wall, you’ll need basic tools like a drill, screws, wall anchors, and a level. Depending on your chosen mounting system, you might also need wire cutters, zip ties, or a staple gun. Make sure you have safety gear like gloves and goggles for the installation process.